
Introduction
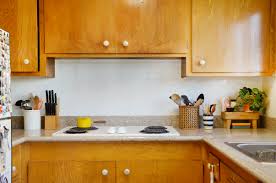
A kitchen backsplash not only adds aesthetic appeal to your kitchen but also serves a functional purpose by protecting your walls from splashes and stains. While hiring a professional for installation is an option, tackling a DIY kitchen backsplash project can be rewarding and cost-effective.
Planning Your DIY Kitchen Backsplash
Before diving into the installation process, it’s essential to plan carefully. Start by choosing the right materials for your backsplash, considering factors such as style, durability, and maintenance. Measure the area accurately and estimate the quantity of tiles needed to avoid running short during installation.
Preparing the Workspace
Once you’ve gathered your materials, it’s time to prepare the workspace. Clear the wall surface of any obstructions and ensure it is clean and free from debris. Protect countertops and cabinets with drop cloths or cardboard to prevent damage during the installation process.
Installing the Backsplash
Begin by applying adhesive or mortar to the wall surface using a notched trowel. Carefully set the tiles in place, starting from the bottom and working your way up. Use tile spacers to maintain consistent spacing between tiles and ensure a professional-looking finish.
Cutting Tiles and Dealing with Obstacles
When encountering obstacles such as outlets or corners, you may need to cut tiles to fit. Use a tile cutter or wet saw to make precise cuts, ensuring a seamless fit around obstacles. Take your time and double-check measurements to avoid costly mistakes.
Grouting and Sealing
Once the tiles are in place, it’s time to grout the joints. Apply grout evenly using a grout float, making sure to fill all gaps between tiles. After allowing the grout to set for the recommended time, use a damp sponge to remove excess grout from the tile surface. Finally, seal the grout to protect it from stains and moisture.
Cleaning Up and Finishing Touches
After completing the grouting process, thoroughly clean the tiles to remove any remaining grout residue. Buff the tiles with a soft cloth to reveal their natural shine and admire your handiwork. Add any finishing touches, such as decorative accents or trim pieces, to complete the look.
Common Mistakes to Avoid
When tackling a DIY kitchen backsplash installation, it’s essential to avoid common mistakes that can compromise the outcome. These include neglecting to prepare the surface properly, using incorrect tools or materials, and rushing through the installation process.
Benefits of DIY Kitchen Backsplash Installation
While DIY projects can be challenging, they offer numerous benefits, including cost savings and personal satisfaction. By taking on the task yourself, you have the opportunity to customize your kitchen backsplash to suit your taste and style preferences.
Conclusion
A DIY kitchen backsplash installation can be a fulfilling project that adds beauty and functionality to your kitchen space. With careful planning, attention to detail, and a bit of patience, you can achieve professional-looking results while saving money in the process.