Are you looking to add a touch of modern elegance to your kitchen or bathroom? Look no further than DIY concrete countertops. Not only are concrete countertops durable and customizable, but they also offer a cost-effective alternative to traditional countertop materials. In this comprehensive guide, we’ll walk you through the steps involved in creating your own concrete countertops, from choosing the right materials to finishing and sealing the final product.
Introduction to DIY Concrete Countertops
Countertops play a crucial role in the design and functionality of any kitchen or bathroom. They serve as both a practical workspace and a focal point for the room’s aesthetic. With DIY concrete countertops, you can achieve a sleek and contemporary look while enjoying the benefits of a durable and long-lasting surface.
Benefits of Concrete Countertops
Concrete countertops offer several advantages over traditional materials such as granite or marble. Not only are they incredibly durable and resistant to scratches and heat, but they also provide endless customization options, allowing you to create a unique and personalized look for your space. Additionally, concrete countertops are often more cost-effective than natural stone, making them an attractive option for budget-conscious homeowners.
Choosing the Right Materials and Tools
Before you begin your DIY concrete countertop project, it’s essential to gather the necessary materials and tools. Start by selecting the type of concrete and aggregates you’ll use, taking into account factors such as color, texture, and strength. Additionally, make sure you have the right tools for the job, including a concrete mixer, trowels, and molds.
Preparing Your Workspace
Creating concrete countertops requires a proper workspace with adequate ventilation and protection from dust and debris. Set up a designated area in your garage or outdoor space where you can work safely and comfortably. Be sure to wear appropriate safety gear, including gloves, goggles, and a respirator, to protect yourself from concrete dust and fumes.
Forming and Pouring the Concrete
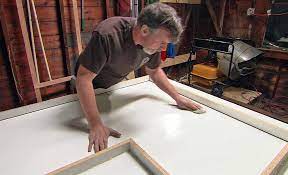
Once your workspace is set up, it’s time to create the countertop mold and pour the concrete. Depending on the design and dimensions of your countertop, you may choose to use pre-made molds or build custom forms from melamine or plywood. Mix the concrete according to the manufacturer’s instructions, ensuring a smooth and consistent consistency, then pour it into the mold and level it with a screed.
Reinforcement and Finishing Techniques
To ensure the strength and durability of your concrete countertop, it’s essential to add reinforcement such as rebar or wire mesh before pouring the concrete. Once the concrete is poured, use a trowel or float to smooth and level the surface, removing any air bubbles or imperfections. Depending on your desired finish, you may choose to polish the concrete for a sleek, glossy look or leave it slightly textured for a more natural appearance.
Curing and Sealing the Countertop
Curing is a critical step in the concrete countertop process, as it allows the concrete to fully harden and reach its maximum strength. Depending on the type of concrete used, curing times may vary, but typically range from 7 to 28 days. Once the countertop is fully cured, apply a high-quality sealer to protect it from stains, moisture, and UV damage. Be sure to follow the manufacturer’s instructions for proper application and maintenance.
Customizing Your Concrete Countertop
One of the great things about concrete countertops is their versatility when it comes to customization. You can add color and texture to your countertop by incorporating pigments, dyes, or aggregates into the concrete mix. Additionally, consider adding decorative elements such as embedded objects, inlays, or etched designs to create a truly one-of-a-kind look for your space.
Maintenance and Care Tips
While concrete countertops are durable and resistant to wear and tear, they do require some maintenance to keep them looking their best. To clean your countertop, simply wipe it down with a mild soap and water solution and avoid harsh chemical cleaners or abrasive scrubbers, which can damage the sealer. Additionally, be sure to reapply the sealer periodically to maintain its protective properties and prolong the lifespan of your countertop.
Common Issues and Troubleshooting
Like any home improvement project, DIY concrete countertops can sometimes encounter issues such as cracking, staining, or uneven surfaces. Fortunately, many of these problems can be addressed with simple troubleshooting techniques such as patching cracks, sanding rough spots, or applying a fresh coat of sealer. If you’re unsure how to fix a problem, don’t hesitate to reach out to a professional for assistance.
Inspiration and Design Ideas
Looking for inspiration to kickstart your DIY concrete countertop project? Browse online galleries, home improvement blogs, or social media platforms for examples of stunning concrete countertop designs. Whether you prefer a sleek, minimalist look or a more rustic, industrial vibe, there are endless possibilities for incorporating concrete into your kitchen or bathroom design.
Conclusion
In conclusion, DIY concrete countertops offer a cost-effective and customizable solution for homeowners looking to update their kitchen or bathroom. With the right materials, tools, and techniques, you can create a stunning and durable countertop that reflects your personal style and enhances the overall aesthetic of your space. Whether you’re a seasoned DIY enthusiast or a first-time homeowner, now is the perfect time to embark on your own concrete countertop project and enjoy the satisfaction of a job well done.

